Game Host Guide
Running a session with Rucky
Everything you need to run a game day — from opening the app to building lineups and recording wins.
Quick Start
5 steps to run a game
- Open the app and tap today's event.
- Tap Start session to open check-in.
- Check players in as they arrive — check-in order sets lineup placement.
- Once players are checked in, tap Build lineup. Shuffle and Captains Pick need 10+; Pick Teams works with any number.
- Record the winner immediately after each game.
Full walkthrough with screenshots in the sections below.
Interactive Demo
Try hosting a session
Run through the full hosting flow with fake players — check-in, lineup building, recording wins, and a leaderboard. Nothing is saved.
How many players?
What a Game Host Can Do
When assigned as host, you'll see the same live session controls the organizer has — for that event only. Your group role and permissions stay the same.
Can do
Cannot do
Lineup Modes
Choose a lineup mode
All three modes require at least 10 players checked in. Players beyond 10 are placed on a third overflow team automatically.
Pick Teams
ManualPlayers used: All checked-in players (1 or more)
How it works: Manually assign every checked-in player to a team. Team count scales automatically: 6–10 → 2 teams, 11–15 → 3 teams, 16–20 → 4 teams.
Best for: Full control over every roster spot
Shuffle
AutoPlayers used: All checked-in players (10 minimum)
How it works: Automatically builds balanced teams across all checked-in players (~5 per team). Players not yet checked in are placed on a separate team.
Best for: Fast setup with no manual input
Captains Pick
DraftPlayers used: First 10 checked in (10 minimum)
How it works: Select exactly 2 captains from the first 10 checked-in players, then snake-draft the remaining 8. Players 11 and beyond are placed on a third team automatically.
Best for: Traditional pickup draft feel
Step-by-step guide
Step 1
Start the Session
Open the app on game day and kick off check-in.
Step 1
Start the Session
Open the app on game day and kick off check-in.
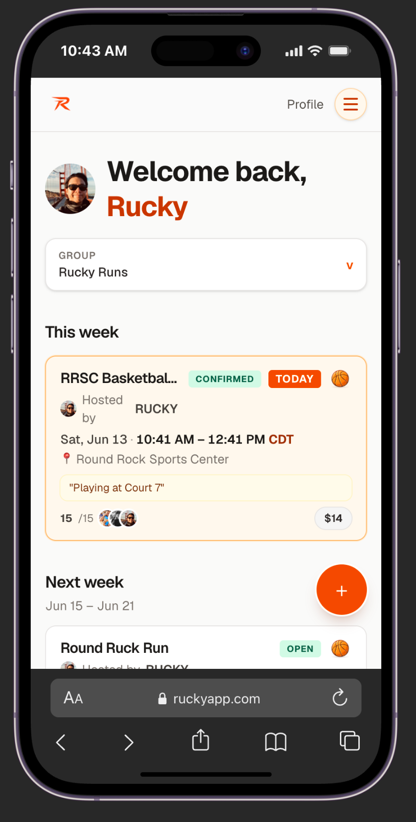
Open the app. Your event appears under Today with a highlighted card.
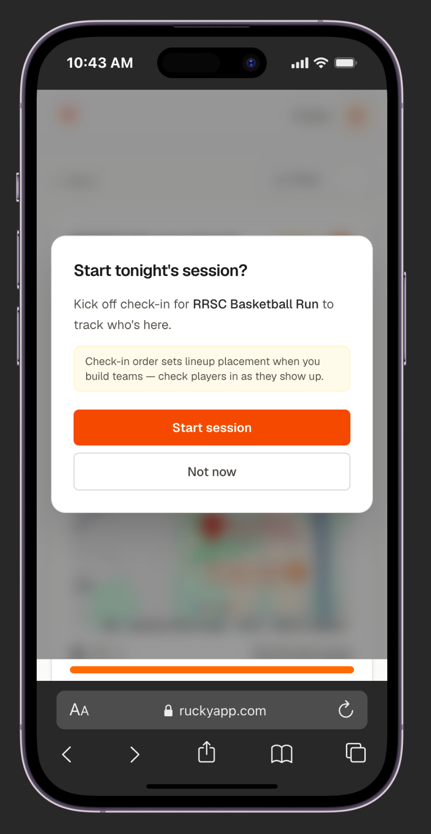
A prompt appears — tap "Start session" to open check-in for players.
Step 2
Check Players In
Mark players as they arrive. Check-in order sets lineup placement.
Step 2
Check Players In
Mark players as they arrive. Check-in order sets lineup placement.
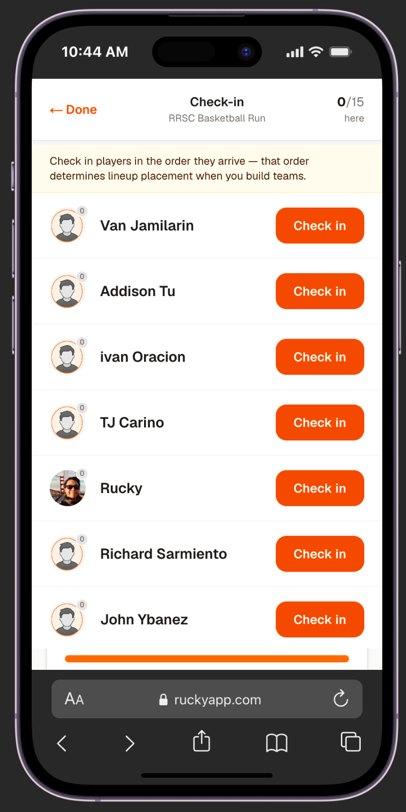
Check-in starts at 0/15. All players show an orange Check in button.
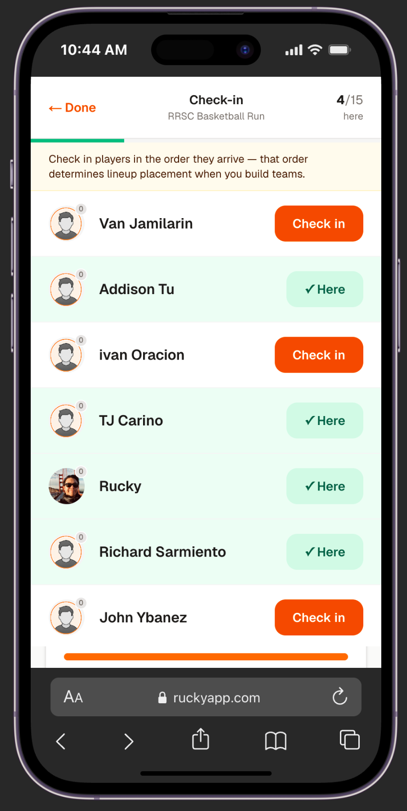
Checked-in players flip to a green "✓ Here" badge. The counter updates live.
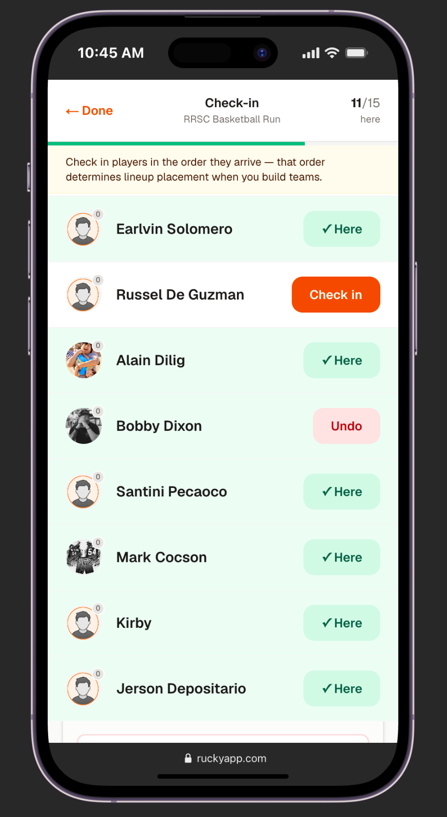
At 11/15 — enough to build. Once you reach 10, the lineup builder unlocks on the event page.
Step 3
Build Lineups
Once 10+ players are checked in, open the event and tap Build lineup to choose how teams are formed.
Step 3
Build Lineups
Once 10+ players are checked in, open the event and tap Build lineup to choose how teams are formed.
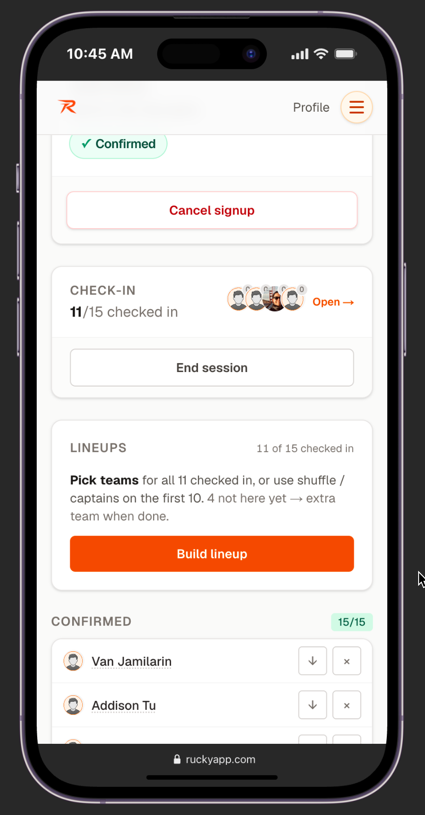
Once 10+ are checked in, the Lineups section appears with the "Build lineup" button active.
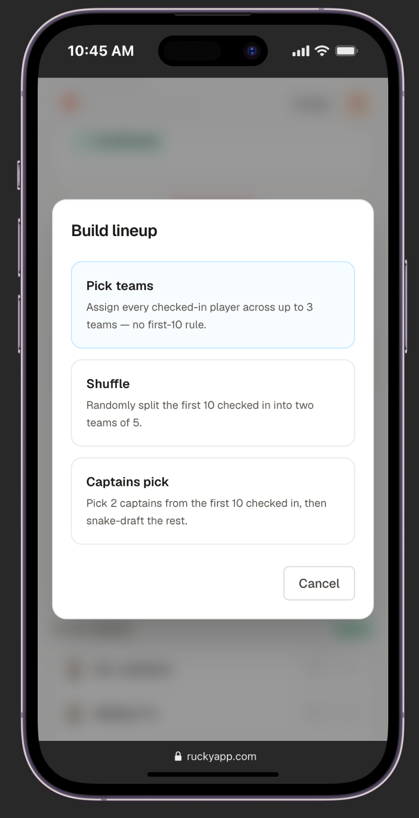
Choose a lineup mode: Pick teams, Smart balance, or Captains pick.
Pick teams
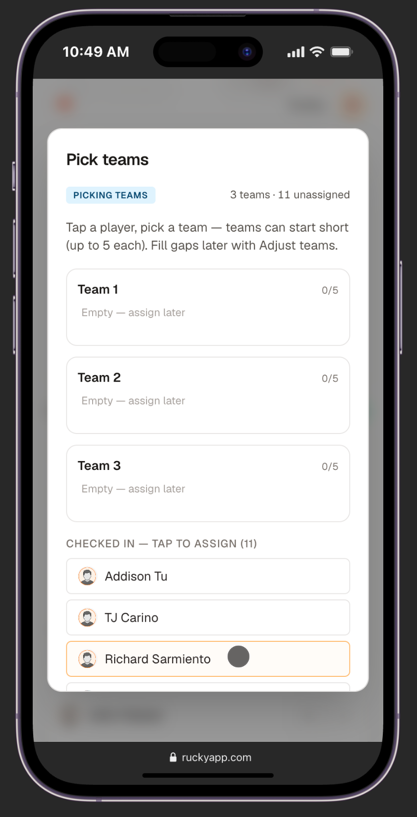
Team slots appear for all checked-in players. Tap a player to assign them.
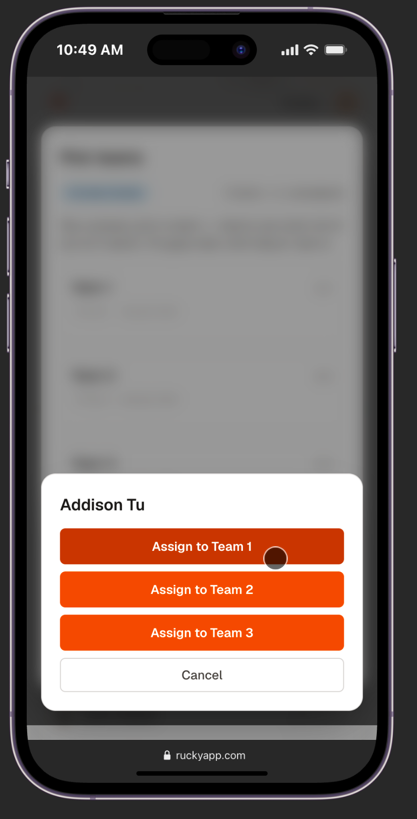
A popup asks which team to assign them to. Repeat for every player.
Shuffle
Captains pick
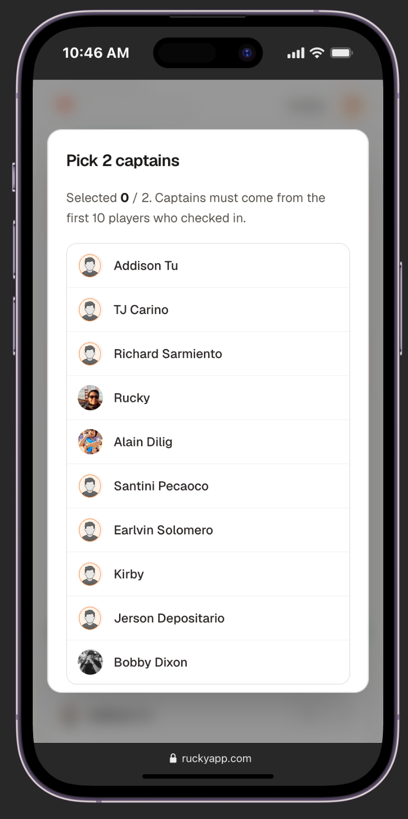
Only the first 10 checked-in players are eligible. Tap exactly 2 to make them captains.
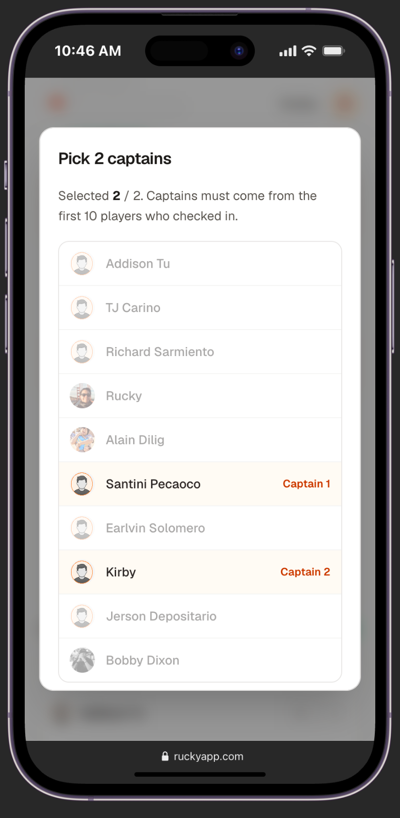
Selected captains are highlighted as Captain 1 and Captain 2. Tap Confirm to start the draft.
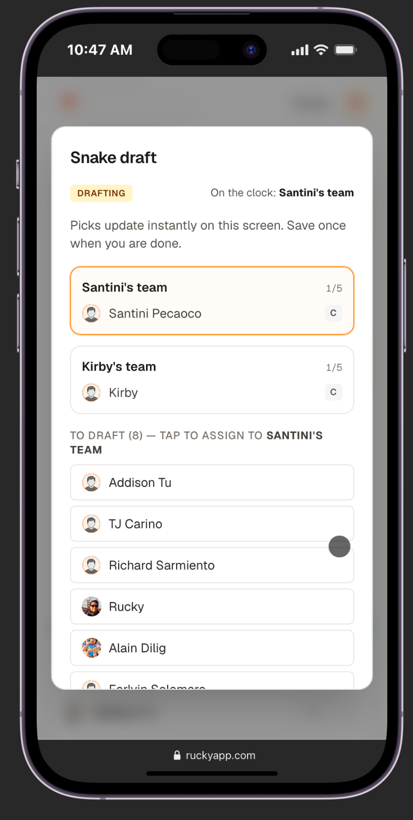
Tap a player from the "To draft" list to assign them. Teams alternate picks snake-style until all 10 are assigned.
Step 4
Adjust Teams & Record Wins
Move players between teams if needed, then record the winner after each game.
Step 4
Adjust Teams & Record Wins
Move players between teams if needed, then record the winner after each game.
Adjusting teams
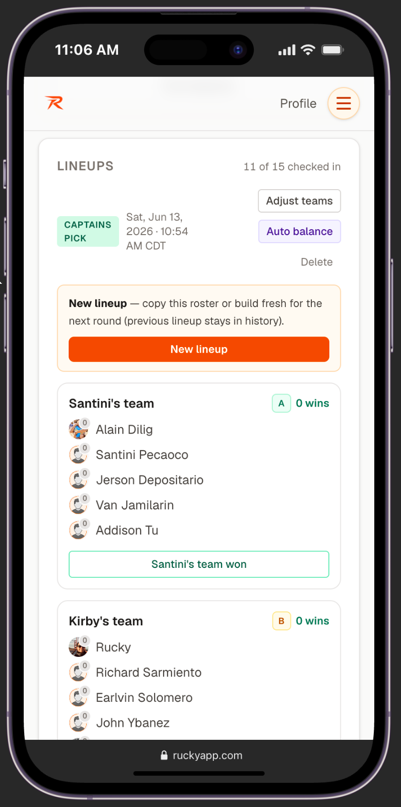
Adjust teams, Auto balance, and Delete are at the top. Each team card has a win button at the bottom.
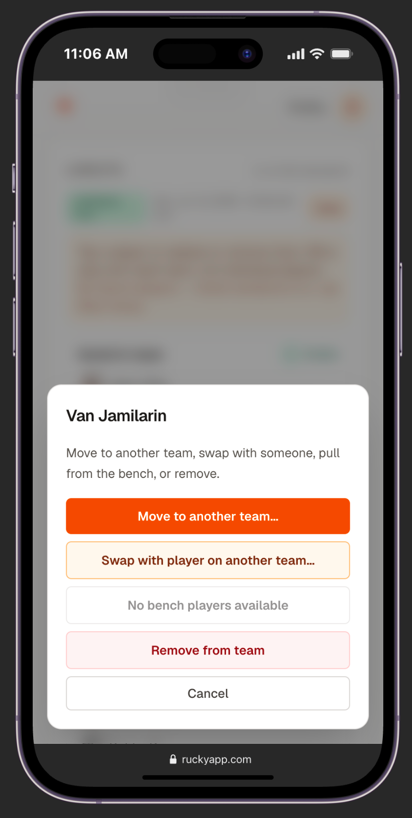
Tap any player to move them to another team, swap with someone, or remove them entirely.
Recording wins
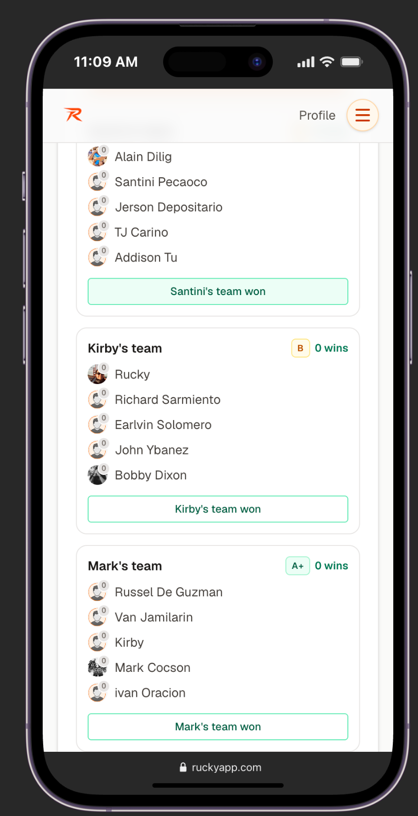
Each team card has a "[Team name] won" button. Tap the winning team.
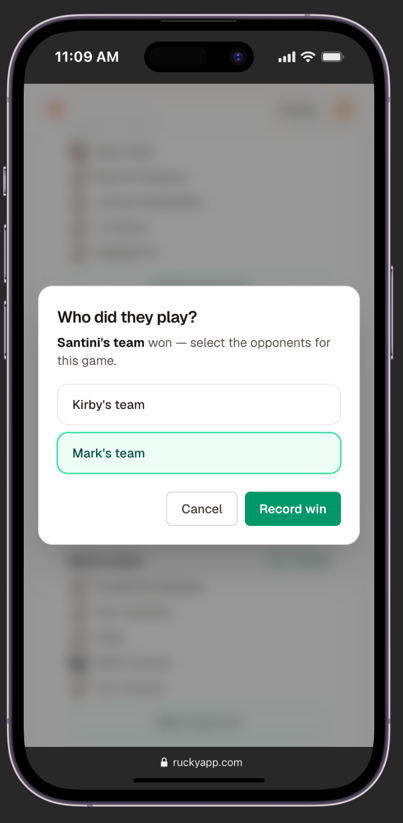
Select the team they played against, then tap "Record win".
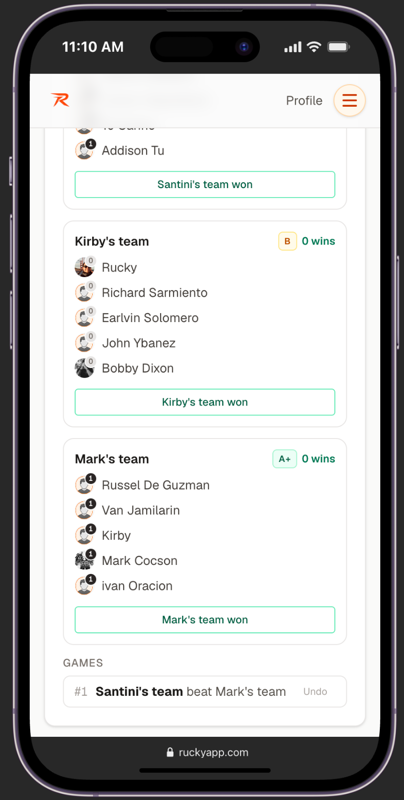
The result appears in the GAMES log. Tap "Undo" immediately if you made a mistake.